# Trailer Setup
### 1. Add necessary components
A trailer is simulated with a TrailerController component. Simply add this component to the ROOT game object of the trailer.
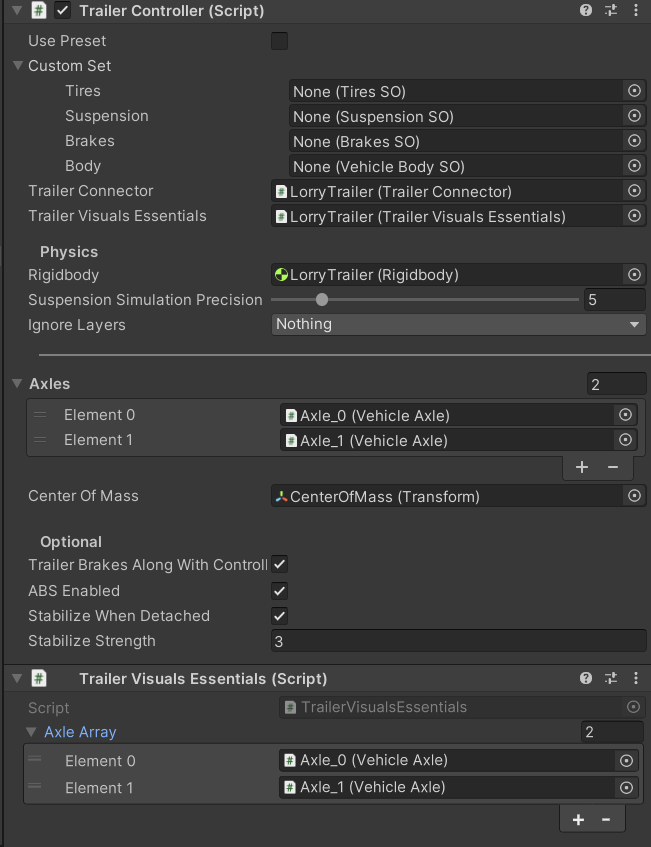
Two other required components will be added automatically: TrailerVisualsEssentials and TrailerConnector. (as well as a Rigidbody and a Joint). The references should be automatically injected as well.
TrailerVisualsEssentials functions similarly to [CarVisualsEssentials](https://distubredone322.gitbook.io/custom-vehicle-controller/guides/additional-settings/car-visuals-essentials).
[TrailerConnector ](https://distubredone322.gitbook.io/custom-vehicle-controller/guides/trailer-system/trailerconnector)is an essential component for actually connecting a trailer to the truck.
### 2. Create vehicle axles
Similarly to CustomVehicleController, TrailerController uses VehicleAxle array. The only difference is that it does not differentiate between front and rear axles.
To add new axles, open a "VehicleAxleWindow".
An editor window should open. Next, make sure the trailer controller game object is selected.
The window will bind to it.
{% hint style="info" %}
You can lock the window in the bottom left to stop rebinding the window after selecting/deselecting game objects.
{% endhint %}
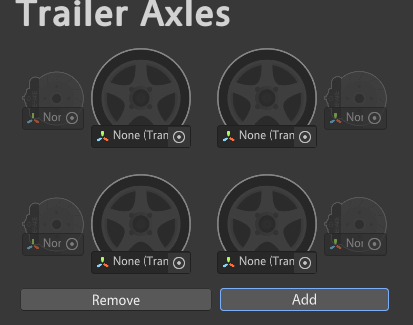
Click on "Add" to add as many possible axles as you want.
{% hint style="warning" %}
Similarly to the initialization of the CustomVehicleController, Brakes Transforms fields are optional. However, only axles that have both Left and Right Wheel Transforms references will count as valid.
{% endhint %}
Drag and drop the wheel references into their respective fields in the editor window
Next, click on the "Add Axles" button.
{% hint style="danger" %}
If the selected game object is a prefab, you'll need to unpack it. If you try to initialize the controller on the prefab, a warning will be shown:

After clicking "Yes", the prefab will be unpacked completely and the controller will be initialized. You won't be able to initialize the controller as long as the selected game object is a prefab.
{% endhint %}
The trailer controller is initialized now.
### 3. Assign parts to the trailer
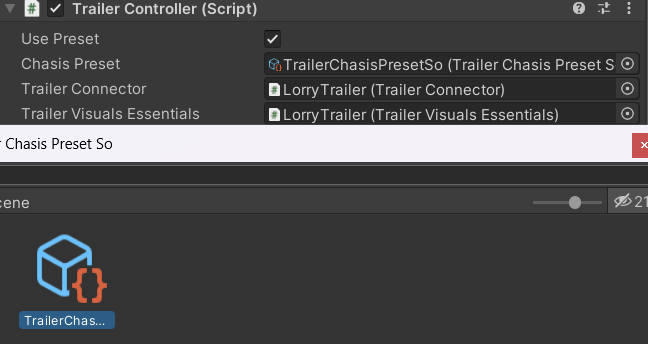
Similarly to the CustomVehicleController, a TrailerController can use a customizable set of parts or a parts preset. The difference is that a trailer only uses "chasis" parts like body, wheels, suspension and brakes.
Set "UsePreset" to True and select a preset from the object find window.
Next, adjust the TrailerConnector
{% content-ref url="trailerconnector" %}
[trailerconnector](https://distubredone322.gitbook.io/custom-vehicle-controller/guides/trailer-system/trailerconnector)
{% endcontent-ref %}
### 4. Creating/modifying/changing parts and presets.
Similarly to CustomVehicleControler, TrailerController has its own editor window where you can create/change/modify parts and presets.
The workflow is absolutely the same to the editor for CustomVehicleController.
{% content-ref url="../workflow/creating-new-parts" %}
[creating-new-parts](https://distubredone322.gitbook.io/custom-vehicle-controller/guides/workflow/creating-new-parts)
{% endcontent-ref %}
{% content-ref url="../workflow/modifying-parts" %}
[modifying-parts](https://distubredone322.gitbook.io/custom-vehicle-controller/guides/workflow/modifying-parts)
{% endcontent-ref %}